Puzzle games are ideal for gamers who want to improve their cognitive abilities. Adventure Escape Mysteries is one of Haiku Games (Hidden Object video games), and combines Adventure, Puzzle, and Hidden Object with features to provide you with entertaining gameplay.
The game introduces a point-and-click interface, which allows you to interact with the world and identify things to solve hard riddles by tapping your finger. On the right side of the screen is an inventory, where all detected items will be added to be used later when needed.
You’ll also get to explore a selection of critically acclaimed tales that have been enjoyed by millions of players all over the world. Prepare to investigate hard cases, locate cryptic clues, and connect the dots to reveal the mystery behind the scene while completing challenging puzzles in the beautifully produced adventures that feature new lighting effects.
We take adventure escape mysteries walkthrough guide with all chapter’s gameplay to get one by one.
Table of Contents
Exploration of Fantasy-themed Kingdom

Before playing open world games, you should read the instructions because they often contain a number of clues. So, the next time you’re reading instructions, be cautious. The cursed crown contains a fantasy kingdom, and it is your responsibility to save it from destruction.
Don’t put it off any longer; brush up on your skills and embark on an adventure to show off your puzzle-solving abilities. The story follows Nimue (Female Heroine) who is about to go on a quest to save her people from being overrun by competitors. Your main focus should be on learning new magical spells while playing the game, such as:
- See-through Walls
- Super-size Plants
Additionally, make decisions because they will determine the outcome of your epic quest’s story. There isn’t just one story in the game; there are a variety of them, each with its own protagonist, layout, location, and set of objectives.
Exploration of Trapmaker
The game allows you to put yourself in the shoes of Detective Kate, who is tasked with solving a bizarre murder case. It takes place in the Trapmaker world, where you are free to interrogate suspects anyway you like and use your detective skills to uncover everyone’s secrets in no time.
Latest Blog: Genshin Impact Nintendo Switch Release Date
Latest Blog: Grand Theft Auto: The Trilogy Definitive Edition Update
Adventure Escape Mysteries Walkthrough Guide
One of the two plots included in the current version of the Escape Room app provided by the developer is Adventure Escape Mysteries Trapmaker. The game begins with a mysterious murder and the arrival of a female game character, Kate Gray, a detective who rushes into the scene to investigate the case.
As I previously stated, the game combines Escape Puzzles with Point-and-Click gameplay features in a well-designed environment. It has hundreds of playable difficult puzzles that will undoubtedly leave you perplexed while trying to solve them.
Your final aim is to investigate a murder case by questioning suspects, identifying the murder weapon, and determining who is to blame for all that has happened. Adventure Escape Mysteries is divided into eight chapters/levels, each with its own mystery to unravel.
We will explain in this adventure escape mysteries walkthrough all 8 playable chapters, and you play as a female protagonist tasked with solving all the puzzles in order to apprehend the murderer.
Adventure Escape Mysteries Chapter 1
The first chapter begins with the introduction of a murder, which reveals a suspicious death, forcing Game Character (Kate Gray) to negotiate the high-tech security conference to determine that it was murder and how the next it happened.
Let’s get started with Chapter 1:
Kate Gray has been summoned to investigate a murder case, despite the fact that she is on leave, according to the narrative. Murphy Lieutenant discovers that six merchants were putting up their transaction when an IT worker became trapped in a booth and died.
The game will show you how to play the game by offering a brief tutorial, which will allow you to locate the police tape in your inventory. Here are some things you’ll need to figure out how to finish puzzles:
- Locate some police tape and use it to secure the area for others.
- To keep the power on, you must adjust the dials.
- Look for a piece of paper with Booth Number on it that has been placed on a table.
- Set the dials to both numbers.
- You also find the individual who was killed, who has left you a message that says “IT with three times underlines.”
- Turn off all letters except I and T three times to set IT.
- Gain access to the room and search for further clues by looking for the dead body.
- Gather all Clues and Chips, as well as the deceased’s tie, and place them in your inventory.
- Solve a Difficult Puzzle by following the pattern on the Tie.
- Drag a treasure bag and set it aside, then cut the bag with a scissor and get the letter
- Placing the letter “A” on the table will yield a locker code, which you must use at all costs.
- Next, take a floor tile off and read the conversations that show on the screen to obtain the code.
- Put the code into the dial to get a chip and an emergency exit.
- More floor tiles should be removed, and all detected chips should be placed.
- To escape out of the room, press the emergency button.
If you follow all of the procedures above, you should be able to finish Chapter one.
Adventure Escape Mysteries Chapter 2
Kate moved on to the second chapter after surviving the worst conditions in the chamber where the murder occurred. Murphy, on the other hand, had secured the vault and informed her that the booth had been visited by 5 persons today.
After that, Kate began communicating with Mr. Harris, telling him that his cabin overlooks the crime site. When Constantine discovers Mr. Harris is not present, he approaches Kate and offers her full-featured interrogation rooms to chat in. Kate responded by declining the proposal and then asked a few things that had been swimming around in her head. You must complete the following steps in order to complete the 2nd chapter:
- Place the chair in close proximity to the table.
- Switch on the Light
- Select the questions to learn more about Constantine’s personality.
- Collect a hint from Constantine.
- Approach the door and try to open it with the security keys.
- To open the door, dial 9539.
- Get out of the room and behind the mirror, looking for hints like a shirt with NIT inscribed on it.
- Solve a difficult problem by swapping parts with one other to create the right shape as directed by the eagle in the center of the circle.
- When you’re finished, the locker will open and you’ll receive a star.
- Then you’re in the interrogation room, where you’ll find a variety of equipment and accessories to help you set up your interview with the suspects.
- Set the project to face the suspect and allow it to recognize the face and provide you with information about the person you’re looking for.
- You can use the code to open the briefcase.
- Gather all of the goods in the luggage, as well as a star.
- Take the Data Cable from the Projector Room, where the luggage is, and put it in your inventory for later use.
- Return to the interrogation room, attach the cord to the project, wipe the mirror clean, and turn it on to begin the clip.
- Place the tissue box in front of the suspect on the table and begin asking questions again to solve the mystery.
- To force the suspect to declare his guilt, use a lie detector machine.
- Take the subject to the safe house after he or she has confessed.
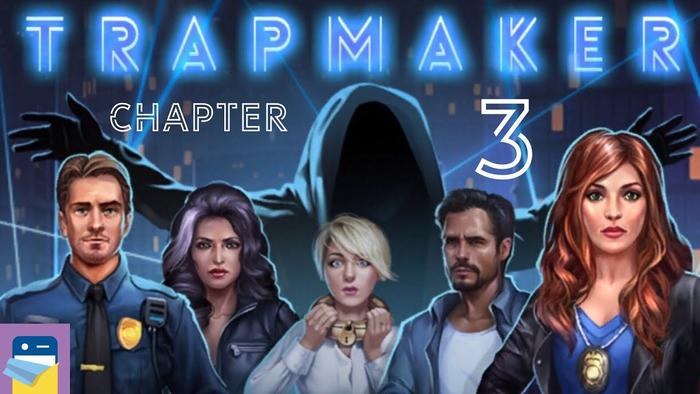
Adventure Escape Mysteries Chapter 3
After that, poisonous gas emanates from the bulb, rendering both characters incomprehensible; the game welcomes you to the Trapmaker Chapter 3. You’ll learn in the third chapter that Constantine admits to committing a robbery but not a murder. The female heroine is locked in a padded room with an unknown person.
- Find a rope from A Point to B Point to solve a puzzle.
- When you’re finished, claim your start so you can use it as a hint.
Furthermore, Trapmaker enters and initiates a conversation with the protagonist, asking whether she knows who he is and realizing that he is the one who is damaged because of you.
- Gather your map, pillow, and shirt.
- Wake up the girl and take her shirt, as well as a dish of food.
- Collect a star that has been placed next to the stranger’s shoe.
- Pick up the metal tray and toss it near the door, as it will destroy the cloth wall and give you a head start, as well as a half of the tray.
- Cut the second section of the wall with your tray to reveal a credit card and a machine that may be used to access the entrance.
A robot with a knife will appear as you exit, compelling you to return to your room. At that point, you must choose which of the collected shirts will be used to bind the robot and limit its movements.
The stranger has an airlock that will not be unlocked until the contamination level reaches zero; consequently, you must repair Dr. Robot’s brain according to Edna’s instructions. Cut the upper head of the robot with a knife and replace it with a new chip from the robot next to it. The game will present you with a puzzle in which you must place chips in order to reprogram the bot.
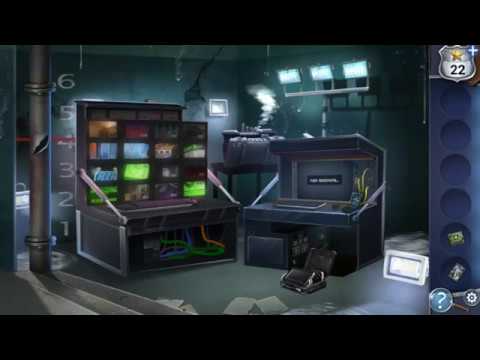
Attempt to collect additional parts strewn across the floor and add them to your inventory for later use. You come across a glass of water with the words “Will Work for Caffeine” and a design printed over it while collecting goods. A few magnets are scattered on the floor; collect them all and proceed to the machine with the five-dial lock. By dialling “10248,” you can rapidly unlock the locker.
Next, open the magnet scanning gadget and deposit all of the collected magnets inside to make it run until the room’s contamination level drops to a safe level. Use the magnet to place a metal ball into the holes throughout the map. When you move the ball to the centre of the map, the contamination level drops and the airlock opens.
The code is “9467,” and when you enter it, the lock will open, revealing a tower that you can use to clean up the blood on the floor. Place all of the Petri dishes in the machine, cover it with a towel, and close it.
Just after that, you must draw gestures by locating the clue; perhaps you saw it over a glass with a pattern drawn on it. The game will invite you to a conference room once the shape has been recognized. You discover a key thanks to Edna, who enters the room you opened after drawing the pattern. Take the airlock off Edna‘s neck and place it in your inventory. Keep the neck lock Edna gave you on the magnet machine, where you finished the puzzle by pulling the metal ball toward the center.
The tick is still ticking, and the bomb hasn’t given up; the Doctor tried but failed to resist, and he made it to the room where you found Late trapped and was destroyed. Move on to Chapter 4 by this adventure escape mysteries walkthrough after collecting three stars.
Adventure Escape Mysteries Chapter 4
Kate is still traversing the booby-trapped conference hall in the fourth chapter of the mystery, as a fiery bus disaster leads her to an uneasy alliance. The chapter 4 places you near a bus that is on fire as a result of an accident. To finish the 4th episode, go through the following steps of this Haiku Games:
- To add to your inventory, collect the Green pieces as well as neighboring things.
- Turn on the device, take the cover of a bright yellow-colored gadget, as shown in the image with number 3, and place the switch over it.
- Choose a Star
- Place the second-placed parts on the device now.
- To begin, collect the green-colored item and place it in the device’s tin pack.
- A side mirror hangs from the bus; try to collect it and add it to your collection.
- The dial is situated over the bus’s central door; try to open it by finding a hint.
- When you dial “48559,” a door will open and an injured person will arrive in town with a first-aid kit.
- To earn a star, try to position things in their proper locations.
- Obtain a seat on the bus after requesting the passenger to do so.
- Take a mirror from your inventory and place it near the laser light; when the light reflects and collides with the bus’s roof, a metal bar will fall. Make a note of the metal rod in your inventory.
- The digital locker will be unlocked by inserting the metal bar into the hole immediately after the mirror room.
- Try to decipher the code by manipulating the bus to see how many tyres it has, how much it weighs, and, of course, how many doors it has, which is “35625.”
- You notice something bound with ropes as the door opens, and it’s Wendy, who won’t believe you’re a cop, not a Trapmaker.
- You discover an unauthorized lockpick after emerging, which you needed to liberate Wendy.
- Take Wendy’s instructions and board the bus, where you must use the fortunate charm and place it in the right location.
- Sliding the driving chairs and arranging the gear as shown in the image will reveal a secret entrance through which you can receive the following: Bomb Suppression Blanket, Long Cable, Illegal Signal Booster, Thin Bar, and Ladder
- To slow down the flames emanating from the bus engine, use Bomb Suppression Blanket.
- Use the long cable to assault the box inside the bus, then pick up the ladder, exit the bus, set it on the bus, and connect the second half of the cable to a signal dish.
- Take the signal booster and set it near the dish where the cable was recently attached.
- Match the blue jamming signal as closely as possible.
- Now, find the blue police frequency and match it.
- You’d be made with that as well.
- Because of the antenna and signal booster, smoke will begin to form, confining you inside with only the driving seats and a few pieces of equipment.
- Collect with equipment by slicing the driving seats and other objects with a piece of cloth. Use the cloth to hold the hot rod in place and save it in your inventory for future use.
- Use the pad to keep the flames from spreading and the rod to get out of the bus. After that, Trapmaker will begin the debate, and the game will take you to Chapter 5.
Adventure Escape Mysteries Chapter 5
After completing earlier chapters, you will be introduced to hard gameplay that will put your investigative abilities to the test. The 5th chapter now follows Kate as she investigates a gunshot sound originating from a dangerous shooting gallery. This time, your ultimate goal is to discover Trapmaker’s weakness in a timely manner.
This time, you’re in a shooting gallery, complete with a sparking wire and an excessive number of toys. You must first collect 2 dolls that are lying on the floor, then proceed to the bag to select further items. Notice a note on the board that indicates “Exhibit Closed,” collect it, and remove the tap that can be used to calm the sparking wire. You get a key, a life straw, and gun oil from the bag.
- Choose a key from your inventory and use it to unlock the lock of a cupboard located immediately after the bag marked with the number 6. There are a lot of toys, and you have to find two toys that aren’t part of the set.
- To finish the puzzle, choose toys from your inventory and arrange them in the gaps. To complete the level, try to add the similar toys vertically and earn a star.
- Select the locker beneath the bad and use your wits and the code to unlock it002E
- To unlock the door, follow the steps outlined in the image. You will be given a light pistol after the locker is opened. Tap on the board’s mechanical section to open it, then fix the life straw to turn it into a functional position.
- Remove two eliminates from the blue-colored cabinet and place them in the red-colored cabinet. To earn a star, select the light gun and click on the poster. Next, select a bullet and place it in the mechanical part of the cabinet to get it to operate.
- To win points and a star, choose the light gun and shoot the animals. You will be rewarded with a Doggie Vest if your goal is completed successfully.
- You locate a dog near the locker and select and outfit the Doggie Vest to allow the dog to bark.
Let’s play with the metal door, which has a six-switch lock. After entering the room you just opened after setting up switches, grab your gun because they’re coming back. Sanjana has issued a cautionary statement.
- Take care of yourself since all of the dummies will start shooting at you in no time, and you must remove them as quickly as possible. You have six bullets to defeat all foes.
- You must restart the game if you run out of ammo. When you’re finished, ask Sanjana to assist you in cleaning the floor.
- Grab the Boom and Robot Arm after that. To advance, select the blossom and clear the floor. To put out the fire, select the robot arm and release the water.
- After that, complete a Trapmaker-designed mini-game by simply controlling a steel ball in a maze-like setting.
- You want to go to the game’s middle by discovering a means to get there. Make your way to a trap once you’ve entered.
- Following that, you and Constantine have a meeting where he tries to persuade Sanjana that Kate is a Trapmaker, not a cop. When you click on the billboard with the image of a trap, it will fall down, and Trapmaker’s speech will be heard over the loudspeaker.
Adventure Escape Mysteries Chapter 6
Both Kate and Sanjana descend to Trapmaster’s lair in Chapter 6, which has a regular difficulty level. Your ultimate goal now is to prevent him from doing so. The sixth chapter appears to be set in an underground area with a plethora of cables. You’ll find Zip Ties at the beginning, which you can use to appropriately tie the wires to clean the surroundings.
After that, complete Chapter 6 of adventure escape mysteries walkthrough and unlock the rest of the game.
- Pick up a Metal Piece and add it to your collection.
- Four Metal Pieces are strewn throughout the wooden box, which also contains a dial lock.
- Slide the Wooden Box under it to collect the fifth metal piece.
- Between the cables, collect Spray Paint and a metal piece.
- You can grab a solid pipe from the top, and then you must utilize the spray over the wall to expose the hint “TM.” Add another Metal Piece to your inventory by collecting it from the left wall.
- Use all eight metal bits you acquired to fill both letters on the wall where you sprayed.
Once accomplished, the game will open a path leading to the underground floor, where you must first use the metal rod to smash the pipe and once the gas has released, you will see some laser lights, which is an alarm system or a trap placed by Trapmaker. A sequence of numbers can be found near the pipe; remember them and exit the chamber to open the lock attached to the wooden box.
- When the box is opened, there is a lot of garbage within.
- Add a Hard Drive to your inventory and try to find a star beneath the garbage.
- Pick up the Throwing Star, the Motherboard, the Locked Phone, and the Paint-Stained Glove.
- You discovered the underground floor and used the throwing start to break the circuit of an alarming laser system; you used Paint-stained Glove to open boxes where you found a key.
- After you’ve opened the big box and found a key, use the found key to open the luggage on the table.
- Fill in the number on the 2nd box’s locker.
- It will reward you with Adrenaline Soda when you open it, which you will need to destroy the Signal jammer.
- To start the computer, connect the hard drive and motherboard.
- Connect the locked phone to the PC in the mini-suite and unlock it.
- To finish the puzzle, align the streamline with the pattern on the wooden box.
- Unlock the second lock, type the names of the remaining channels.
- To recover the file and decrypt it, hack the system by the pattern.
- You’ll get a call from an unidentified Trap maker.
Adventure Escape Mysteries Chapter 7
You must disarm three bombs concealed in an elevator in the 7th chapter. As a result, you should do all in your power to defeat the trapmaker by solving all of the puzzles and avoiding all of the deadly traps placed for you and others. Begin by collecting goods from the Bucket, such as the Lightbulb and Wire Cutter. Cut the cables available on the booth using the wire cutter to create a map of the looby.
- Set the lightbulb to the convention centre and try to access the locker by entering the code “2836” that you acquired from the convention center’s lightning lamps.
- The Prohibited objects are unlocked, and you receive a hammer, which you’ll need to break the glass below the available box.
- Gather Liquid Nitrogen Spray and use it to make Knight.
- To unlock and get two gifts, spray and pound the box depicted.
- Place the map in one of the two packages and connect the letters to make a pattern.
- To get an electric screwdriver, open the second package.
- To defuse the bomb, remove all screws from the container, cut the red wires, place batteries, and turn on all switches with the screwdriver. After that, get a key card.
- Place the card in the elevator and select the rooftop to approach.
- Collect cloth banners, warning signs, and UV glass once you’ve reached the rooftop.
- To disable the traps, use the electric screwdriver to open the securely sealed doors.
- Clean the screen with the cloth before beginning to place signs.
- As soon as you’ve finished the problems. After then, the elevator will begin to move upward.
- You must collect Green Buttons, Cloth Banner, Handrail, and UV Glass while the lift is stopped in the hallway.
- To get out of the jammed door, use the wooden piece to open it.
- Enter a vibrant environment with a variety of flaming lights and other decorative items.
- Input the text “FineMe” to see if you can solve the problem.
- A door will open once you type, leading to a detonator room.
- Come out and pick up some goodies, including Plug Pairs.
- To disable the device, connect the plug pairs in the detonator mechanism.
Adventure Escape Mysteries Chapter 8
In this chapter, Kate, the most popular investigator, will be confronted with her suspects in a surprising ending, revealing who murdered Frank Deitch and who is Trapmaker. The last chapter would reveal many more secrets, as several officials began to take an interest in you and offered to assist you in solving the riddles.
Assign each officer a duty and return them to their duties. Begin by gathering items, such as the Squeeze Air Blower, Wire Cutter, Car Window Breaker, and others, like we did in earlier chapters.
- Cut all available iron wires using the Wire Cutter to earn a star.
- To remove the broken table from the scene, click it.
- To add to your inventory, click on the power cable and remove it.
- Select the Car Window Breaker and rip the mirror into multiple pieces.
- Enter through the window that leads to a little room.
- Open the yellow suitcase and take the Scuba Mask. Then click on the hanging camera, select Squeeze Air Blower, and clean the camera to see whether it works.
- To operate the camera, you’ll need a Scuba Mask to view the numbers you’ll need in the yellow-colored light, which will display you “5859.”
- Add the camera to your inventory and clean the other electronic gadget using the Squeeze Air Blower.
- Remove any unnecessary wires with the wire cutter, connect the power line, and then connect the camera to view the footage.
- Complete the video and go on to the next scene by properly arranging the footage.
- The final scene takes place in the holding cell where Kate was held after stealing a stranger girl.
- Collect the robot arm, the empty samples, the spray, and the UV light
- Pick up the UV Light, spray some samples, and collect them.
- Place the machine in another room with the robotic arm and use UV light to expose the pattern to release the security code.
- Many green gas cylinders have a contamination level of 0 next to them.
- Return to the room where a DNA machine is accessible to check the gathered samples and use UV Light to capture samples near the green gas cylinders.
- Finally, collect all members and probe each one individually using evidence, demonstrating that the Trapmaker is Frank.
Conclusion Summary
There are more than 11 Playable Stories in Adventure Escape Mysteries by Haiku Games, each with 8 chapters to explore. Each plot will provide you with an unforgettable experience while also sharpening your investigative skills. The provided adventure escape mysteries walkthrough guide will come in handy whenever you find yourself stuck anywhere and have no idea what to do next.
Murder and adventure mysteries are entertaining to play, but the difficult puzzles can make you irritated if you don’t find anything to proceed with. Eleven experiences have already been named, and more are anticipated to be announced soon. To show off your detective skills to your friends, try to play with others and solve the case.